Okra known in many languages as Ladies’ Fingers, Vendakkai,
Bhendi, Bhindi, Bendakaya or Gumbo.


Did you find this post useful? Feel free to share your feedback in the comments area.
If you are interested to be notified for the new posts from us, then you can make use of the subscribe option available on the right side menu.
Help us to improve our search rating by recommending this post to Google using the Google plus button below.
Recently I watched Programme in You Tube called “ Paarambariya
Maruthuvam”,
Click here
to see this wonderful programme (worth watching) where in herb specialist Sakthi Subramaniyam
Guruji explained about Okra’s nutrition benefits and I was surprised to know its
rich source health benefits compounds like: Protein, Zinc, copper, potassium,
Vitamins A, K, magnesium, calcium and also act as medicine
for blood cancer, skin disease, infertility and anti diabetic.... the list is goes on… Okra is very low in calories and dense with nutrients.
I was not much fan of this vegetable so far, but this programme has changed my mind set and started to intake this vegetable in all forms.
Here is one such interesting recipe in Maharashtraian Style.
Bhindi is stuffed with roasted ground nut powder and besan flour with spices
and shallow fried in medium flame. Stuffed Bhindi/Okra Fry curry is very easy to make and suitable to
be served as main dish.
Ingredients:
Okra/Lady
Finger/Bhendi – 12 to 15 nos.
Besan Flour/ Bengal Gram Powder –
3 tbsp
Roasted
Ground nut Powder – 2 tbsp
Garlic and Ginger
Paste – 1 tsp
Garam Masala
– 2 tsp ( you will get it in Indian Store)
Cumin seeds
power – ¼ tsp
Coriander
Powder – ¼ tsp
Red Chili
Power – ¼ tsp
Turmeric
Powder – ¼ tsp
Salt to
Taste
Oil fry
shallow fry – 2 tbsp
Method:
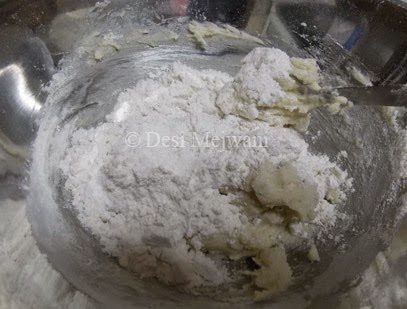
Take a big plate
add above masala ingredients as per picture showed in this picture
Mix it
nicely with a drop of oil
Wash the
okra nicely and with help of paper towel wipe excess moisture on okra.
Chop off the
tips and slit the okra and fill the
okra with Masala mixture
Heat a pan
with 1 tbsp of oil and add the stuffed okra and cook in medium flame for 8 to
10 minutes.
Stir fry in
between and check if bhendi changes color to slight brown,then switch off the gas
Transfer it
to serving plate and enjoy the super healthy dish with chapati/roti
Serving: Serve with chapati/roti with curd garlic raita.
Note:
If you want more Masala crispy version- Add onion and
extra Masala mixture into seasoning oil and then add stuffed okra and shallow
fry it.
If you are interested to be notified for the new posts from us, then you can make use of the subscribe option available on the right side menu.
Help us to improve our search rating by recommending this post to Google using the Google plus button below.