Mor Kuzhu is very quick and easy to prepare. Authentic
south India, Tamil Nadu dish served as breakfast or as snack . You can prepare this
dish in just 15 minutes (including preparation time). This dish also called as Mor kali. In Tamil language Mor means buttermilk
and kuzhu means porridge. Seasoning with dried marinated chilli /mor milaga gives
amazing taste to this dish. This recipe is simple, healthy, delicious, tangy, and
spicy in taste. Cut them in to
pieces and give any shape of your choice and turn them as interesting snack. Kids
will love this snack, when they come back after school or even you back from
office. Sometime you should know
the quickest recipes too when your stomach begins to growl. Check out our
step by step photo recipe to learn.

Ingredients:
Rice Flour – 1 cup
Sour Butter Milk – 1 ½ cup
Salt
- 1 tsp
Water – 2 cups
Seasoning:
Mustard Seeds – 1 tsp
Urad Dal/White lentils – 2 tsp
Chana Dal/Bengal Gram split – 2 tsp
Curry Leaves – Few
Hing/Asafoetida – ¼ tsp
Oil
- 1 tbsp
Mor Molaga/ Dried marinated chili
– 3 to 4 nos
Method:

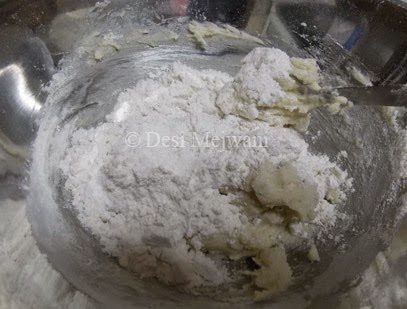
In a bowl add
rice flour, butter milk, salt and 2 cups of water and whisk it nicely
and prepare it as batter.

Put a
reasonable size heavy bottom pan on the range and heat oil. Fry the mor
molaga/dried marinated chili, once they are start turning to dark brown color remove
them from oil and transfer it plate and allow them to cool.


crush some mor molaga and mix it nicely.

Reduce the flame to medium and stir the mixture slowly. Add 1 tbsp of oil and mix it gently. This improves taste and also helps to leave the mixture from the pan fast

When the mixture
starts to leave and not sticking to sides of the pan and bottom of the mixtures
changes to light golden color means it is done. Switch off the gas.
We like the crust
in the bottom of the mixture, so I keep little longer time. We sisters, always
fight to get the crust from our mom.:)
Serving: Serve extra
mor molaga for more spiciness.

Note:
1. Use the sour
curd/ butter milk to get the traditional taste.
2. You can use
green chili instead of dried marinated chilli
3. If you are
using dried chili, then reduce the salt in batter mixture. Dried chili by default has lot
of salts in it.
4. Generously
use of oil gives nice taste to the dish
5. Grease the plate and pour the mixture and allow them to cool and cut them in to
pieces and give any shape of your choice turn them as interesting snack!

If you are interested to be notified for the new posts from us, then you can make use of the subscribe option available on the right side menu.
Help us to improve our search rating by recommending this post to Google using the Google plus button below.